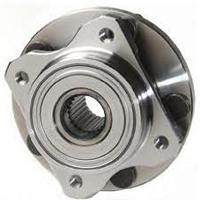
 I have a 2001 Chrysler Voyager 2.5 crd engine vehicle and on a recent trip through Europe I have noticed some humming when I had the wheel turned to the right. This indicated that the right side wheel bearing is on it’s way out and needs to be changed.
To test it, just put the car in neutral while driving it and if the humming groaning stops than most likely the CV joint, if it keeps on humming, it’s the wheel bearing.
In the UK where I live online help or sites are virtually non existing for voyagers and for most of the other cars. there are forums that specialise on a certain car model, but that’s about it. Unlike in the States, where they are all over the place and very easy to find parts and help. Car parts stores are few and between and car supplies are limited to Ebay or breaker yards/junk yards or the national car part store Halfords.
Here is the easy way to change the wheel bearing hub.
Since there was no help found online, I had to use a PDF format service manual I had found after searching for a while on the net so the process was slow and time consuming. Took me 3 hours to do it but had there been some forum or other info that explains the steps, it would have taken no more than perhaps an hour at the most.
Here is the way to do it.; You only need four wrenches or rachets and one spanner. A 21mm, an 18mm, a 10mm and a 32mm socket and a 15mm spanner.
First you have to take the wheel off on the side where it humms. Than you have to take the brake calipers off by unscrewing the two 21mm bolts that is holding it in place in the back and slide the brake rotor off.
After that you need to take the pin out of the center bolt that holds the CV joint and take the cap off of it and use the 32mm socket and some long extension to unscrew the big 32mm nut. There are two washers, one is a thin one and one is wider one, take them out and notice which one is outside which is inside.
Now when you look in the back of the wheel hub which is also the bearing hub, you’ll see on one side a little thingy with a wire going out of it. That’s the ABS sensor. Unscrew that with the 10mm socket and pull it a side. There is a rubber grommet that is pushed into a hole in the back and just pull a bit stronger to pull the sensor out.
Now if you look there behind the wheel hub, there you’ll see 4 bolts. Those 4 bolts are holding the wheel bearing hub. If you look you can see that the ABS grooves are right next to them and you can’t use anything else but half of an open spanner.
If you push in the CV joint by hand it’ll go back about an inch or so and than you’ll have plenty of room to unscrew those 4 bolts using the 15mm spanner.
Once the bolts are out, you need to take the hub out. That will most likely stick there like if it was glued, but only rust, dirt and corrosion holding it there. Use a chiesel or screwdriver and hammer it in there in between the hub and steering knuckle on all four side auntil the shoulder which is about half inch in size slides out and after that the whole wheel hub comes out easily.
No need to take the steering knuckle or anything else off like the book says.
Before you install the new one, clean all the dirt and rust out by using some sandpaper ad rag and WD40 or brake cleaner. Before installing the new one I had put some grease on the grooves of the CV joint and also on the seat where the new wheel bearing will slide in.
That 32mm center nut is a bugger to remove because the factory tightens it like there is no tomorrow. I tightened it just to a reasonable tightness and put the cap back on and the pin. That will never come off of there even if you just hand tie it.
Put the ABS sensor back on, slide the brake rotor back on and then put the brake caliper back on and the wheel. that’s all there is to it. Takes about an hour at the most if you have a cup of coffee in between bolts.
